How To Make A Silicone Mold
Safety and Precautions: Please refer to the Material Sheet which accompanied your shipment. All products should be used with good ventilation. Skin and eye contact, ingestion and breathing of dusts and vapors should be avoided. It is recommended you use gloves, dust masks, and eye protection.
 Types of RTV Silicone Molds:
Practice makes perfect! For first time mold makers, we recommend you make a small mold for practice before attempting to mold a valuable piece.
There are four common types of molds (“Silicone Mold Types and How To Make A Silicone Mold”)
- Block mold: one piece with no negative drafts of undercuts. This is probably the easiest mold to produce. The original part should be placed in the box so the silicone is able to flow around it. If the part is simple, it can be placed in a plastic cup, a disposable plastic container or a wooden box (pine wood not recommended). If you choose a wooden box make sure to seal it properly if it appears to be porous.
- Block mold-multiple piece: This can be made exactly like a block mold and simply cut in half once it cures to remove the part. If you prefer not to cut the mold, partially fill the container and allow it to cure. Then apply a thin layer of release agent, and finish pouring the mold. When the second layer is cured, the mold should easily separate.
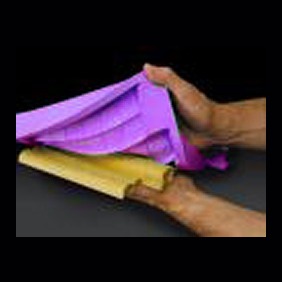
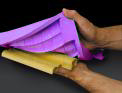
- Glove mold-brushed onto the pattern: This requires a thixotropic agent which allows the silicone to be brushed on an original piece without running off the surface. The thixotropic agent can be supplied in the catalyst or as a separate additive. This type of silicone is ideal for building restoration. The silicone can be bushed on an original piece of crown molding, allowed to cure and then be removed. The mold can then be taken back to the mold shop where parts can be cast to produce replications of the original molding. This type of molding is also becoming popular to cast rocks or stones to create molds of fake rocks, rock climbing walls, side walks and props for theme parks. Silicone Moldmaking Instructions!
- Cast Glove mold: This is made by creating a void around the original part in a consistent thickness. It is usually done by forming modeling clay around the pattern and then forming a hard shell around the clay. The shell can be made by using fiberglass, urethane or plaster. After the shell has cured, the clay is removed; creating a void which can be filled by silicone.
Supplies needed:
include gloves, mixing containers, stirring sticks, a gram scale and a mold box.
There are several web sites which can explain how to build an actual mold box. A brief summary of common mold boxes is listed in the section entitled “Types of molds”.
Determine your Chemistry: There are 2 types of moldmaking silicone materials.
-
ADDITION cure ( Platinum Catalyzed)
See our QM Series of Silicone from MPK Enterprises for examples of Addition Cured
-
CONDENSATION cure (Tin Catalyzed)
See our 100 Series of Silicones from MPK Enterprise for examples of Condensation Cured
Be aware of which system is best suited to your application
| Basic Information | ||
| CONDENSATION | PLATINUM | |
| Mix Ratio | 10.1 | 10.1 |
| Pot Life & Demold Time | Varies depending on Catalyst Not heat accelerated |
Room temperature or can be heat |
| Risk of Inhibition | Not likely | YES |
| Shrinkage | Less than .03% | Less than .01% / Nil |
| Durometer | 7 – 40 | 30 to 70 |
 |
Preparing the Model: Porous surfaces, such as wood, should be dried and sealed. A clear acrylic spray lacquer is an acceptable sealer. Also applying a release agent, such as petroleum jelly will aid in easy release of a silicone mold. Because silicone can sometimes bond to surfaces which contain silica, such as glass, cements and natural stone; it is recommended to do a spot test for possible adhesion. Mixing and Curing: Stirring individual components before use is recommended. Make sure to weigh and measure accurately. Close containers tightly after use. Products should be stored in their original, sealed containers in an environment that does not exceed 90F. Under these conditions, the product will achieve the expected shelf life. Please refer to the individual products technical sheet to determine the products expected shelf life. The following procedure is an example of a 10:1 mix ratio addition cure product. Please refer to the product’s technical sheet for mix ratio information:
Mix thoroughly by hand or with mixing equipment while minimizing air entrapment until a homogeneous mixture is obtained. This will occur when the material takes on a uniform color with no visible striations. Scrape the sides and bottom of the container thoroughly several times while mixing. Once mixing * is complete it is recommended that the material be de-aired 2-3 times by intermittent evacuation for a few minutes to minimize any imperfections due to bubbles in the cured material. Typically after releasing the vacuum 2-3 times the mass will collapse on itself at which time the vacuum should be left on only 2-4 minutes longer *Dispensing machine mixed material does not normally need to be de-aired. |
 |
Pouring the Mold: To pour the mold, begin by pouring a stream of silicone into one corner of the mold box. Allow the liquid to push the air out ahead of it to avoid inducing air into the mold. If you have a highly detailed mold, some moldmakers recommend applying mixed silicones directly onto the detailed area and applying low pressure air before pouring the remainder of the mold. |
 |
Demolding: Please refer to the recommend time to demold on the technical sheet for the individual products. Remember to carefully demold at this point, since the mold has not yet achieved a full cure. |
 |
Storing the Mold: It is best for the mold if it can be stored in the original mold box or on a surface that will stress them the least. If left in a distorted shape for extended periods of time, the mold may not be able to return to the original state. Keep of out sunlight and in a cool, dry area if possible |